PAX WebLink - Accurate
Connect Terminal
Configuring network settings
- Select the ⋮ on top right to display the menu
- Select ‘Wi-Fi Settings’ from the menu and connect to your network.
Configure Till
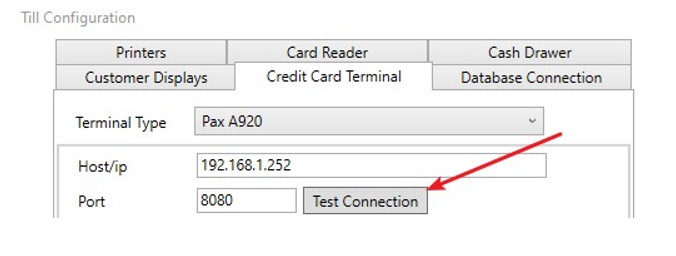
- Run the till application as Administrator, select ‘Configuration’ and then the ‘Credit Card Terminal’ tab.
- Select ‘Pax A920’ from the ‘Terminal Type’ dropdown list.
- Turn on ‘Pax A920’
- The device ip and port will be displayed at the bottom of the ‘Pax’ screen. Enter these details into the ‘Host/ip’ and ‘Port’ boxes on the till, then click ‘Test Connection’

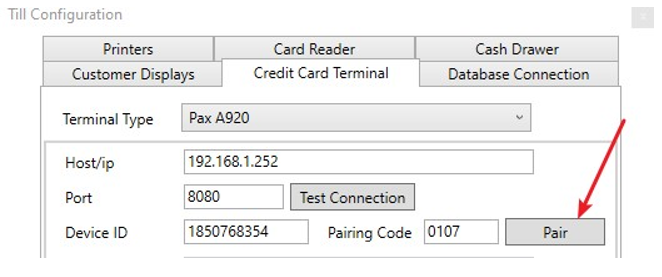
- On the ‘Pax’ screen select the ⋮ on top right to display the menu and then select ‘Pair’.
- Enter the ‘Device id’ and ‘Pairing Code’ provided into the boxes on the till and click ‘Pair’ as below.

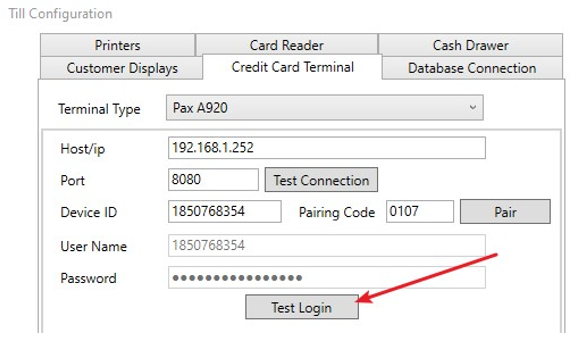
PAX - WebLink 7. If step 6 was successful the ‘User Name’ and ‘Password’ would have been filled in. Click/press the ‘Test Login’ button.

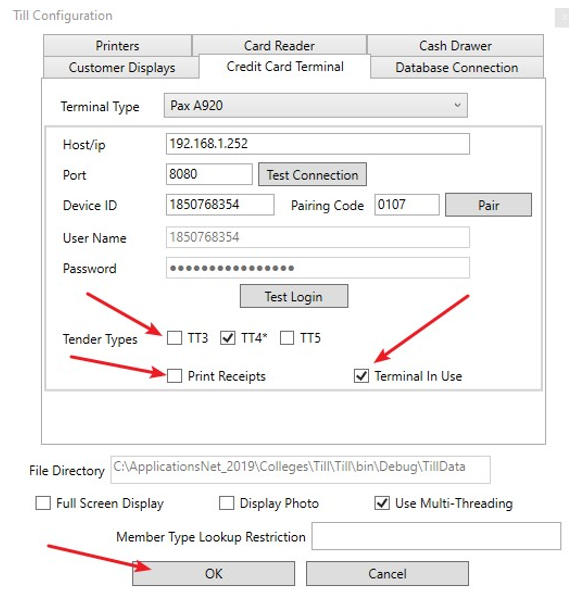
- Select the tender types (usually TT4) where the terminal is required.
- Select whether the terminal should print receipts, usually this would be selected. If not selected customer card receipt and merchant receipt will not be printed.
- Select whether terminal is currently in use.
- Click/press ‘OK’ to save the changes.
