MDS Onboarding Platform User Guide#
A new approach to selling merchant services. Increasing sales, reducing costs and keeping your business safe…that’s the MDS mission
FAQ’s
What is an API?
Application Programming Interface, refers to a set of rules and protocols that tells separate software programs how to communicate with one another
What is a Chargeback?
When a customer does not receive his goods or services or says he didn’t place an order or make a purchase, he can ask his issuing bank to charge back the purchase to the merchant within a 60-day timeframe. The issuing bank will notify the merchant when this happens, after which the merchant will need to validate and defend the purchase by providing such information as the amount, an invoice or folio, customer signature, or shipping documents
What is CNP?
CNP stands for Card Holder not present
What is E-commerce?
Electronic commerce or ecommerce is a term for any type of business, or commercial transaction that involves the transfer of information across the Internet
What is GDPR?
The General Data Protection Regulation (GDPR) is a Regulation in the making by which the European Commission intends to strengthen and unify data protection for individuals within the European Union (EU). It also addresses export of personal data outside the EU
What is a MID?
A merchant ID–sometimes called a merchant account number, service entitlement number, or service establishment number–is a number that is associated with a merchant account, which is used to handle credit card funding
What is MOTO/Mail Order Telephone order?
A type of card-not-present transaction in which services are paid for and delivered via telephone, mail, fax, or internet communication
What is a Payment Gateway?
A payment gateway is an e-commerce application service provider service that authorizes credit card payments for e-businesses, online retailers, bricks and clicks, or traditional brick and mortar. A payment gateway facilitates the transfer of information between a payment portal (such as a website, mobile phone or interactive voice response service) and the Front End Processor or acquiring bank
What is PCI DSS?
he Payment Card Industry Data Security Standard (PCI DSS) is a proprietary information security standard for organizations that handle branded credit cards from the major card schemes including Visa, MasterCard, American Express, Discover, and JCB. Private label cards
What is a TID?
Terminal Identification Number, also known as a TID or TIN, is a unique number assigned and linked to a specific point-of-sale (POS) terminal or workstation that can be used to identify the merchant operating the terminal during credit card sales transaction processing. This number is required to set up online processing through online payment gateways, and is created and provided by the bank or merchant service provider with which a company has set up a merchant account. The number not only identifies what company is using what specific terminal, but also tracks each POS processing transaction made at that specific location
What is a Web app?
A web application is application software that is accessed using a web browser. Web applications are delivered on the World Wide Web to users with an active network connection
What is a PayFac?
A Payment Facilitator or Payfac is a service provider for merchants. When you want to accept payments online, you will need a merchant account from a Payfac
What is an ISO?
ISO’s – also known as Independent Sales Organisations or Member Service Providers/ Merchant Service Providers (MSP’s) – are third-party companies that act as the middlemen between merchants and the acquiring banks (who ultimately take in the payments for credit card transactions
What is an Acquirer?
An acquirer is a financial institution that acts as an intermediary between merchants and card payment networks such as Visa and Mastercard
MDS Back Office
Logging In
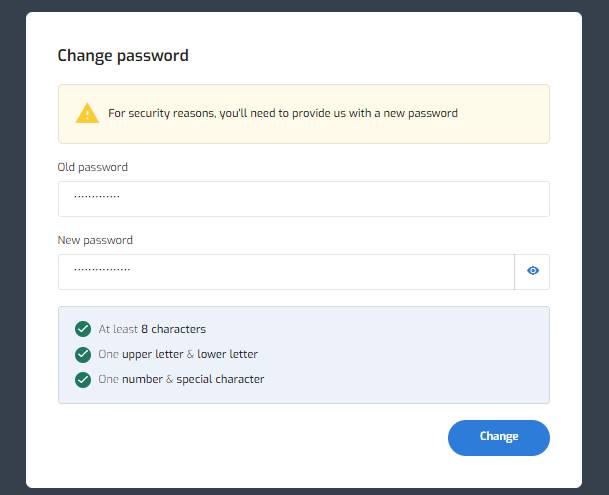
When you are set up on the MDS back-office system, you will be given a username and a temporary password. When you first attempt to log into the platform, you will be required to create a new password for your user account.

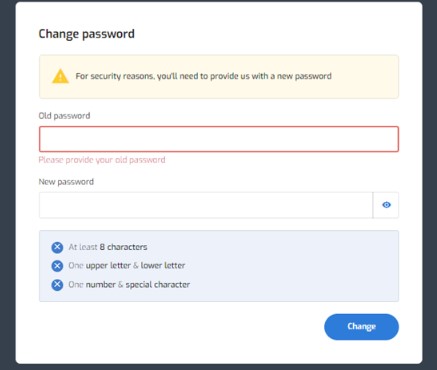
When creating a new password you will have a set rules you need to adhere to, shown above. Once you have changed your password you will have access to the platform.
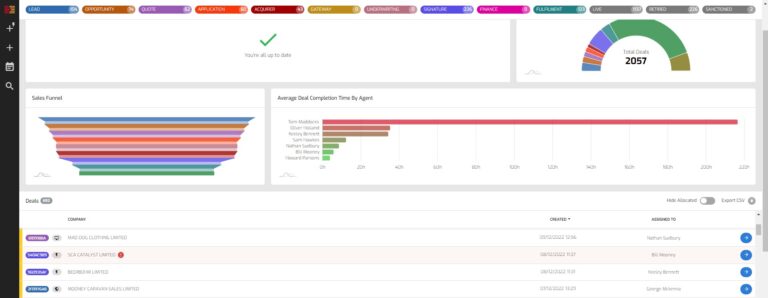
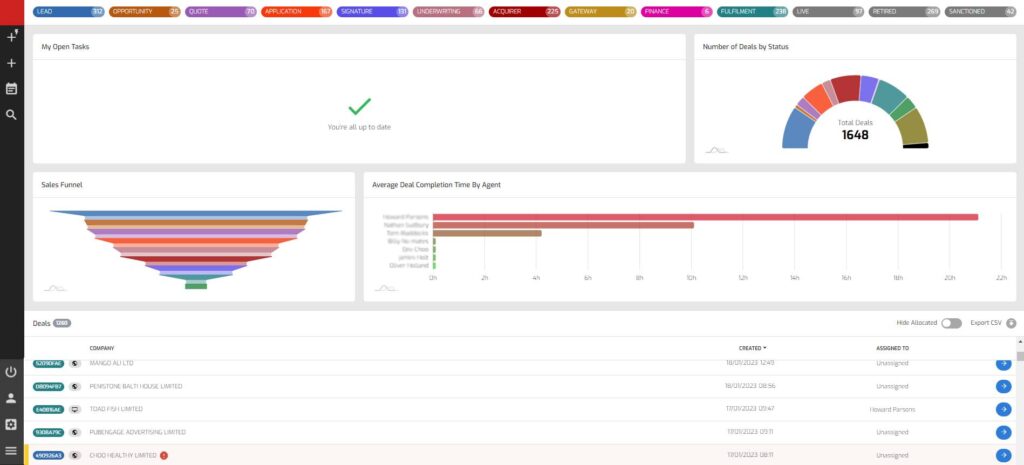
Your Dashboard
The MDS dashboard is permission driven to either display team, personal or company wide MI data.

The application status tabs across the top are context sensitive. Allowing users to toggle which statuses of an application they want to see, allowing them to focus on a particular status or set of statuses. Depending on the status toggles that are active across the top will determine what applications are displayed in the application list at the bottom of the screen.
Status tabs
These coloured tabs along the top of the dashboard screen represent the statuses a merchant deal can through during the MDS onboarding process;
Lead:
The deal has just been added to the platform and is awaiting the required data entry fields to be populated in order to progress
Opportunity:
The basic merchant data has been captured and the deal has been promoted to an Opportunity – The merchant is interested!
Quote:
The merchant has provided all required information in order for a quote to be created
Application:
The deal will only move to Application once a quote has been accepted by the merchant
Signature:
The merchant contracts that require a signature have been sent to the merchants email address provided
Underwriting:
All the merchant data we have captured in the MDS platform has been put through our underwriting engine. based on the result returned, will determine if the merchant can progress
Acquirer:
The completed application has been submitted to the acquirer
Gateway:
The merchant account is being setup for their gateway
Finance:
The merchants application has been sent to our terminal finance provider for review
Fulfilment:
If the deal has reached this stage, we are confident all checks have passed. The device(s) that were selected in the quote are now being configured and will be out for delivery soon
Live:
The merchant has received their device(s) and can start transacting
Retired:
At any point during the journey, a deal can be retired by a user if they the set user roles. This can be used for any deal that can not continue in the onboarding journey – For example, they failed the underwriting checks
Sanctioned:
If the merchant appears to be on an acquirer sanctioned list, this status can be selected
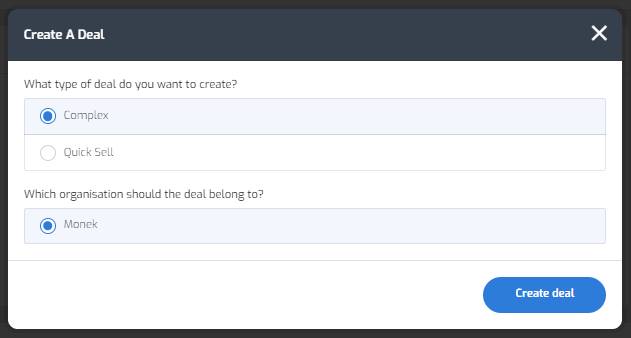
Creating a new application
New applications can be created from the dashboard by clicking the + button. Depending on your environment setup, this will either open a new application screen for users to complete, or, you will be presented with a modal where you can select what type of application you want to create; Assisted or Quick-Sell and against which Organisation. The default organisation for your user will be pre-selected.
The initial status of new applications is New. Once the minimum data has been entered; First name, last name, email, mobile telephone, company legal type and company name. Once these fields have been populated, the application status will progress to Lead and save the application.
All email fields within MDS have built in email validation, allowing users to enter email addresses and know they are valid. If the email address entered is not correct, MDS will display an alert to the user.
![]()
If users then choose to exit the new application, it is now automatically saved and accessible from the dashboard.

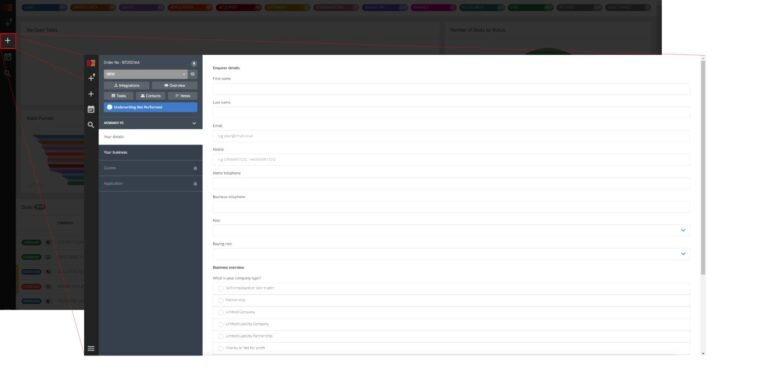
Progressing an application The process of creating a new merchant application in the MDS platform is split into 4 sections;
Your details:
This section captures the details of the person enquiring about payment processing on behalf of the company / merchant
Your business:
This section captures the company specific details such as; MCC, sales channels, annual turnover etc.
Quote:
This is where users can create quotes using the pricing parameters built into the platform
Application:
Additional is captured in order to build a complete profile of the merchant. Allowing risk levels to be established
Each of the above sections are required to be completed before the proceeding section becomes available – Unavailable sections are identified by the padlock icon

Registered company lookup
The MDS platform has a built in lookup for all UK Limited Companies, LLC’s, LLP’s and Charities. Self Employed / Sole Traders and Partnerships do not have this functionality – Therefore, the details automatically populated for Limited Companies, LLC’s, LLP’s and Charities via the lookup become manual entry.
In order to search for a Limited Company, LLC, LLP or Charity, select the option form the Company Type selection.

To search for the company, begin typing in the company name and you will be presented with the options that closely match – The search is driven by key word entry…the more characters entered, the more specific the search results that are returned are.

Selecting the company name from the list will return registered address, director details, incorporation date, SIC code and VAT number.

The ‘What does your company do?’ question refers to the merchants MCC code. Due to the extensive list of MCC’s, we have configured a key word search. Depending on the characters / business descriptor entered, we provide the closest MCC from our approved list.

Sales channels
The sales channels selection represents where the merchant will be taking their payments via;
In Store / By phone:
A card-present (CP) transaction occurs when payment details are captured in person for a product or service. This can include cards that are physically swiped via a card reader machine or tapped or dipped via a card reader
Online:
The buying and selling of products and services over the internet
MOTO / Virtual Terminal:
A system that allow businesses to take and manage card transactions remotely. They are called “virtual” terminals in contrast to the physical terminal used to process card payments when the payment card is present
For each sales channel selected, the platform requires the split percentage to be specified. For example, if only ‘In Store / By Phone’ is selected then the ‘In Store / By Phone’ percentage needs to be 100%.

If multiple sales channels are selected, then both the percentage sliders need to equal 100% combined.

If 100% is not met, a message is displayed on screen.

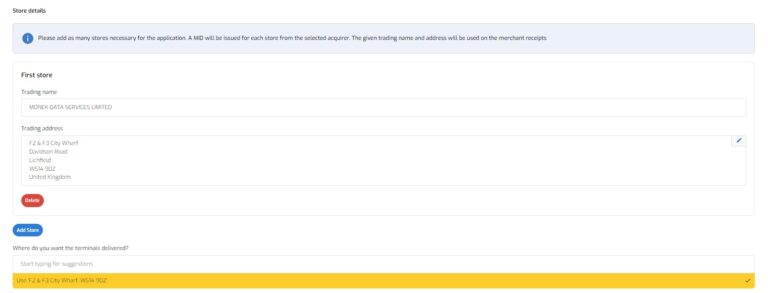
If ‘In Store / By Phone’ is selected, the platform requires that a store location, or locations, are added to the merchant application.
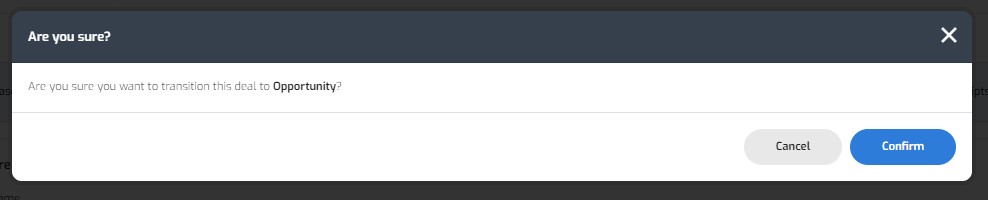
Once all the details in the Your details and Your business sections have been captured, you can then qualify the deal – This will set the deal status to Opportunity.
Quote
Once the deal is at quote stage, users with the appropriate permissions will be able to create quotes and send them to the merchant. The quote screen will display a terminal selection if ‘In Store / By Phone’ has been selected in the previous screen.

After terminal selection, the platform will then present the pricing that the merchant is available to choose from – This selection is based on the data that has been previously captured in the data collection screens.

Once the pricing (price pack) has been selected, if the user has the permissions assigned to their user account, they will be able to edit the default rates displayed to suit the merchants requirements. Each rate within the price pack can have a set minimum and maximum value that users can not go below or above.

Once the quote has been created, it can be sent to the merchant via email for review. Clicking ‘Finalise & Send’ will issue an email to the email address provided in the Your details screen.
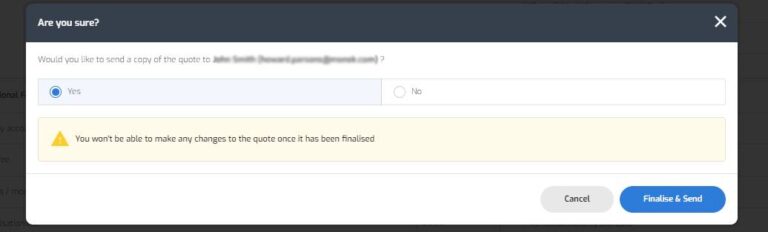
Once sent, the merchant can either accept or decline from their email, or, the user can also perform this action on behalf of the merchant if required. An accept or decline emails is then sent to the merchant and the user.
Decline:
If the quote is declined by the merchant, a reason is required. An email is sent to the user assigned to the deal and a new quote will be required to be created
Accepted:
If the quote is accepted, the deal will progress to the next status – Application
Application
The next stage is to complete the additional application fields. These fields are used to determine the risk level of the merchant.
The banking section of the application utilises a bank lookup service. Using the sort code and account number entered we are able to return the merchant banking address.

During the initial company selection at the start of the onboarding journey, when a company name is selected from the provided list we return any director details provided, such as; DOB, appointed on date. The platform requires at least 3 years of address history for each Director and Shareholder within an application. A prompt will be displayed to the user if 3 years is not met.
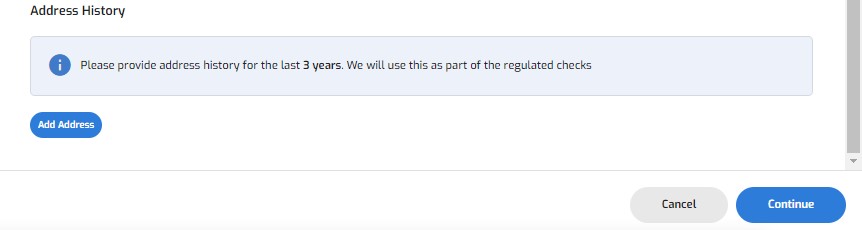
Users can add as many addresses as required until the 3 years is met.
Signature request
The Authorised Signatory section in the application is where users need to select who from the listed people need to sign and complete the contracts. The platform will present a list of people based on the directors / shareholders and their email address to select from. The details for these people is based on the data collected in the previous People section. Once a director / shareholder has been selected from the list, the user can click Continue to submit the application.
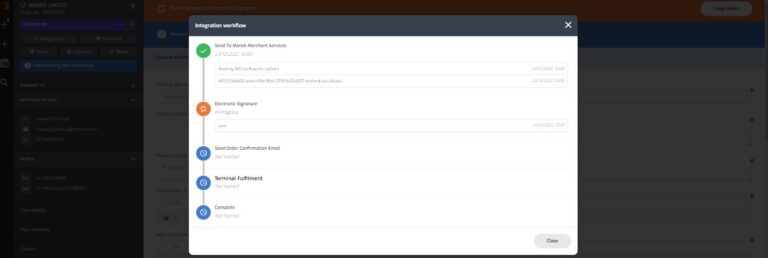
Submission & integrations
Once submitted, the configured integrations will start. The data collected in the platform becomes read-only and cannot be changed.

The integration sequence can be tailored to the order that your business performs the onboarding and underwriting processes. The integrations are all API driven, meaning once submitted, there is no additional data capture required. Once all the integrations are complete, the application will progress to the Live status.
Creating users
Creating users in the MDS platform couldn’t be simpler. If your user account has the required permissions, you can access the Settings screen in the dashboard, which can be found in the bottom left corner – the cog icon.

Navigate to the users tab on screen and click Create.

The following data is required to set up a new user; First Name, Last Name, Email and Telephone. The ‘Is assignable’ field, if selected, means applications that are added to the platform can be assigned to this new user account.

Password
A temporary password needs to be created for the user. Their username will be the email address previously entered. The temporary password must meet the required criteria of; At least 8 characters, one upper letter case and one lower case letter and one number and special character. The MDS platform uses PCI:DSS compliant password procedures. All user account passwords must have at least 8 characters, one upper letter case and one lower case letter and one number and special character.
Groups
Users with the required permissions can also set up user groups within MDS and associate users to those groups. These groups can have permissions allocated to them. For example, a junior sales group may allow its users to create and edit quotes but not send them to the merchant. A senior sales group may allow its users to send the quote to the merchant.

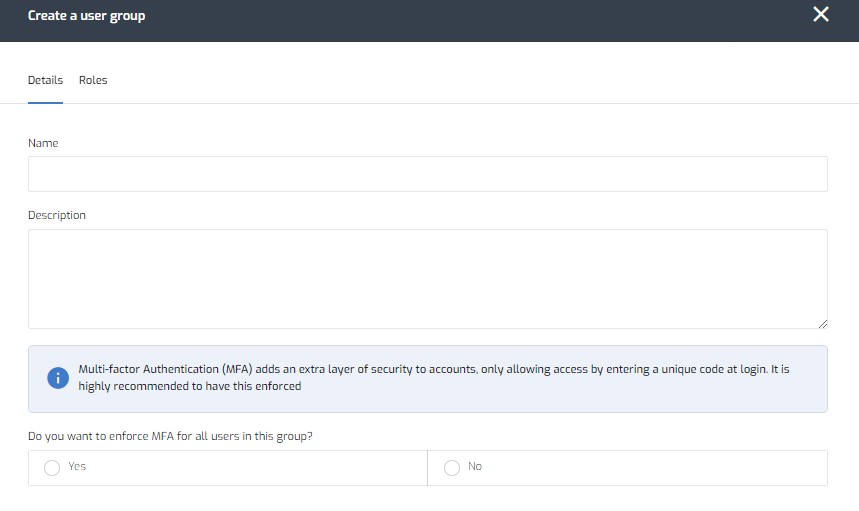
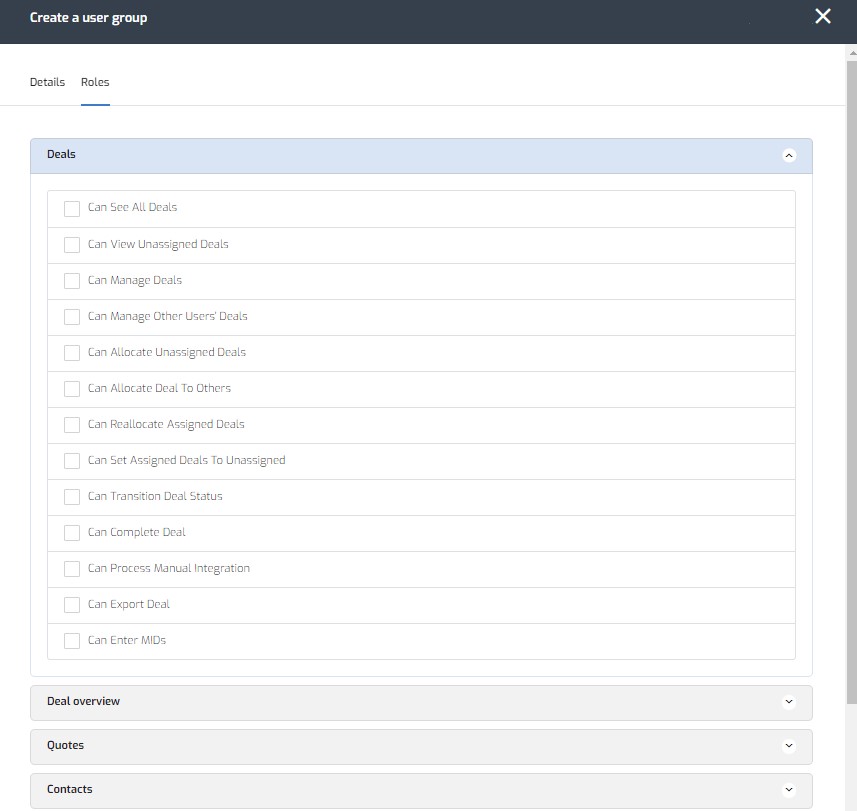
Roles
When creating groups, users need to associate roles to that group before it can be saved. Roles enable or disable the groups ability to perform certain actions within MDS.

Multi-Factor Authentication (MFA)
Multi-factor Authentication (MFA) adds an extra layer of security to your account, only allowing access to your account by entering a unique code at login. The code is provided by the Google Authenticator app installed on one of your trusted devices.
Setting up Back Office MFA
Multi-factor Authentication (MFA) adds an extra layer of security to your account, only allowing access to your account by entering a unique code at login. The code is provided by the Google Authenticator app installed on one of your trusted devices.
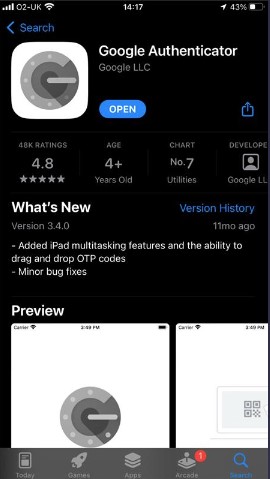
Google Authenticator App
First of all, download the Google Authenticator app from your smart phones app store.
Once downloaded, navigate to your MDS Back Office login screen and log into the platform.
Once your logged in, head into the system management screen of the platform – This is the 3 lines icon in the bottom left corner. Clicking will then display the other icons; A cog, a user and a log out icon. If you do not see the 3 lines icon, you may not have the required user roles to access the system management screen. You will need to contact a system administrator to set MFA up for you.
Select the User icon displayed. This will bring up your user profile screen.
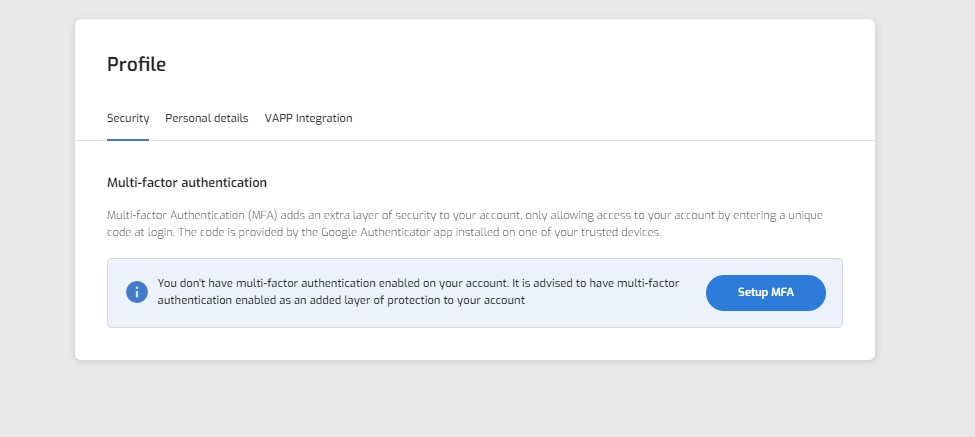
Select the Setup MFA button as shown above. This will display a QR code on screen, as shown below.
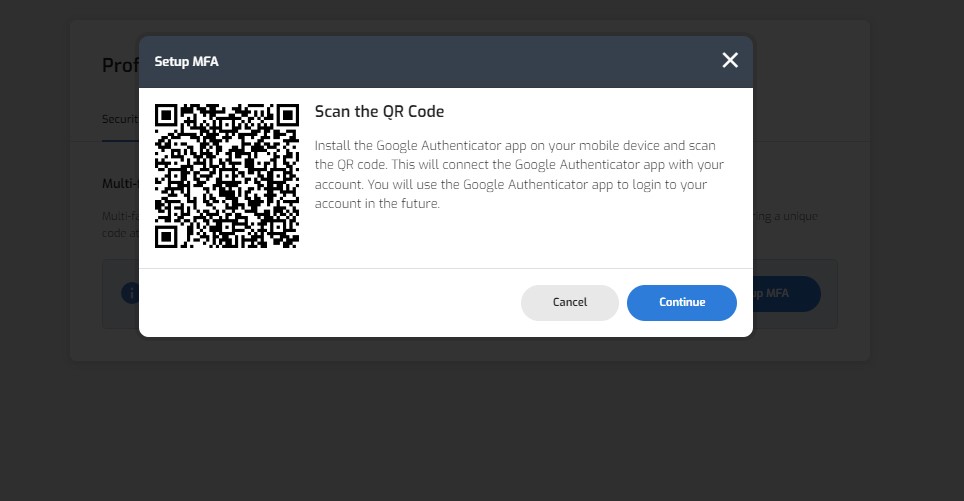
Open the Google Authenticator app and tap the + icon in the bottom right corner and then select Scan QR code. This will open your camera. Scan the displayed QR code with the camera on your personal device.

Once you have scanned the QR code, this will add an entry into your Google Authenticator app.

You can then log out of the platform. When you next log in, you will be prompted to enter a code. This code can be found in the Google Authenticator app. Note, the code changes every 30 seconds.
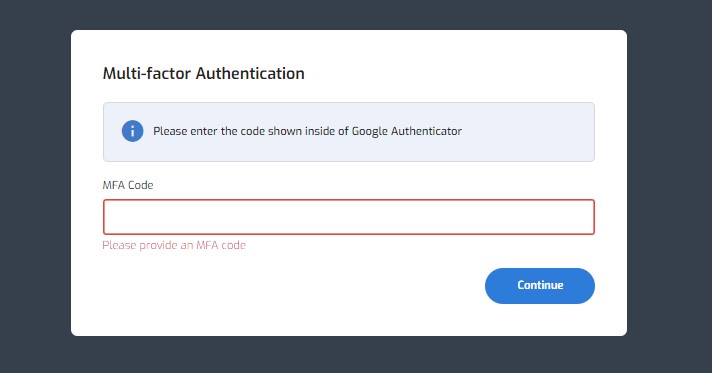
Enter the code into the login screen, and then click Continue.

Your account is then setup with MFA and is secure. You will need to enter a new code each time you attempt to login.
How to Retire deal#
What is Retiring a deal? A merchant can be retired for many reasons on the MDS platform; If they fail underwriting checks, the merchant was not contactable or they decided to go elsewhere. In these scenarios, the merchant application can be retired. All the details are saved within MDS and applications can be un-retired, if you have the correct permissions assigned to your user account so no data is lost / removed and applications can always be restarted.
To retire a deal, go into the deal you wish to Retire, in the top left corner of the screen you will see the current application status.

This field is a drop-down menu item that allows users with the assigned permissions to manually transition applications to different statuses, Retire being one of those statuses. Select ‘Transition to Retired’ from the list provided.

A reason for the application transition is required. If the reason needed is not in the list provided, you can select ‘Other’ and manually type a reason.

Creating users
Creating users in the MDS platform couldn’t be simpler. If your user account has the required permissions, you can access the Settings screen in the dashboard, which can be found in the bottom left corner – the cog icon. If you have the permission required to create users and groups, you will see the following options in the Settings screen. If you do not have these options, or you cannot see the Settings Cog icon, please contact you system administrator.

Navigate to the users tab on screen and click Create.
The following data is required to set up a new user; First Name, Last Name, Email and Telephone. The ‘Is assignable’ field, if selected, means applications that are added to the platform can be assigned to this new user account.
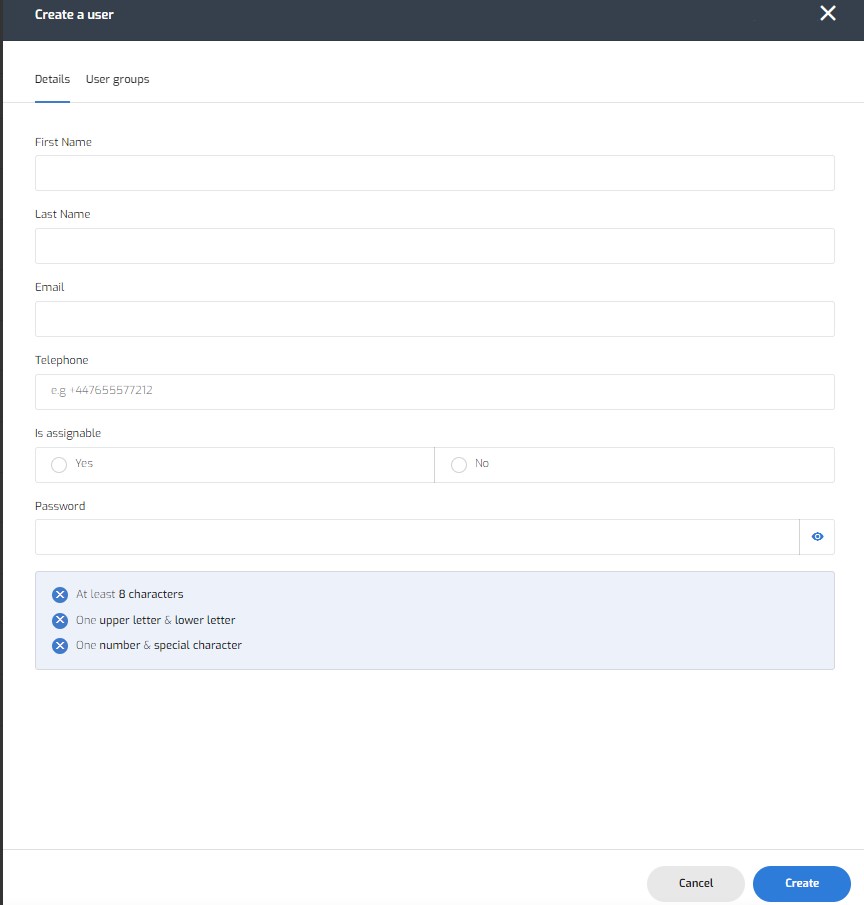
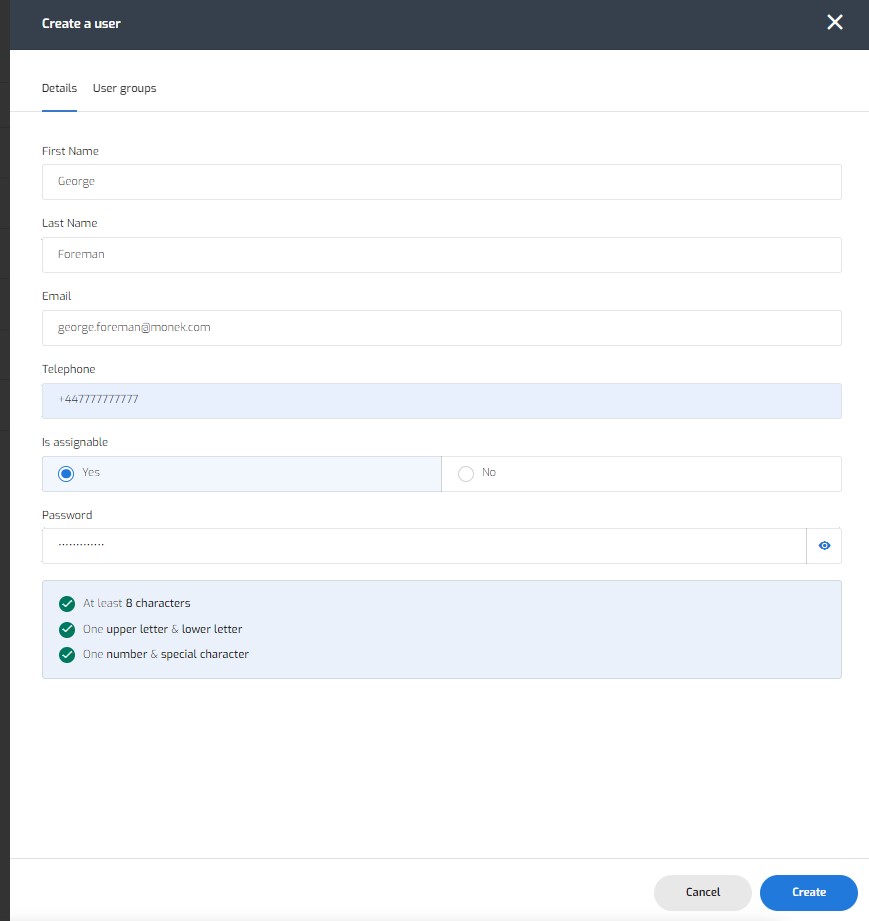
First name: First name of the new user you are setting up Last name: Last name of the new user you are setting up Email: The new users company email. This will become their username when logging in Telephone: This is can be their work mobile, or if not required, you can enter ‘+447777777777’ Is assignable: If this is set to Yes, then applications within MDS can be assigned to this user. If this is set to No, then applications can not be set to the user account and this user will not be able to manage merchant applications. Password: This is a temporary password for the users initial login to MDS. Once they log in for the first time, they will then be required to set a new password
Password
A temporary password needs to be created for the user. Their username will be the email address previously entered. The temporary password must meet the required criteria of; At least 8 characters, one upper letter case and one lower case letter and one number and special character. The MDS platform uses PCI:DSS compliant password procedures. All user account passwords must have at least 8 characters, one upper letter case and one lower case letter and one number and special character.
Once ‘Create’ is clicked, the new account will be saved and an email from AWS (Amazon Web Services) will be sent to the new user containing the temporary password that was set.
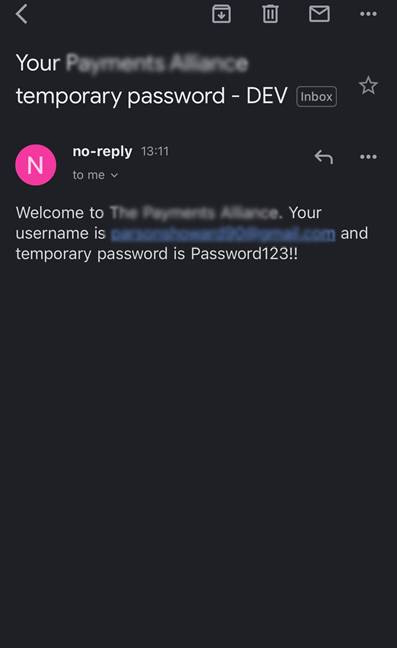
The user can navigate to the MDS platform and proceed to log in.

Once logged in using the username and temporary password, the user will be asked to create new password. This will be the password to be used for every login.
Groups
Users with the required permissions can also set up user groups within MDS and associate users to those groups. These groups can have permissions, or role, allocated to them. For example, a junior sales group may only allow its users to create and edit quotes and not send them to the merchant. A senior sales group may allow create, edit and send the quotes to merchants.
Roles
When creating groups, users need to associate roles to that group before it can be saved. Roles enable or disable the groups ability to perform certain actions within MDS.