PAX A920 Pro Wifi base setup
Step 1
Unfortunately, the base unit does not come with a preassigned MAC address, so it is necessary to connect it to your network and identify the device base through your DHCP server. The base unit will self-identify as "L920PRO-number."
Step 2
Once you have the DHCP-assigned IP address for the base, we strongly recommend setting a static IP on your DHCP server. If this is not feasible, you can alternatively open a web browser and connect to the IP address assigned to the base by the DHCP server.

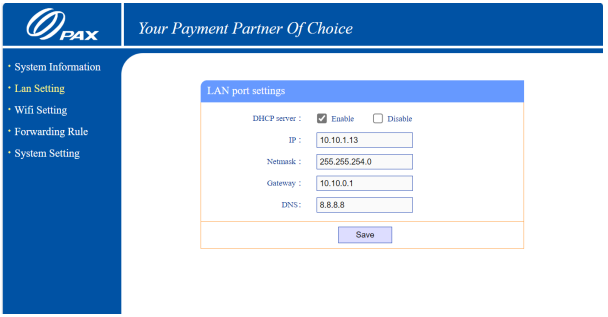
Login into the base – by default the password is “admin"
Select Lan setting, as setup as per your requirements
Step 3
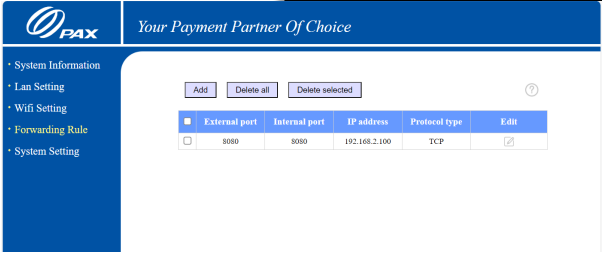
If this terminal is connected to a POS system, it's essential to open port 8080 for the POS to communicate with the terminal. To create a forwarding rule, please add port 8080 (TCP) with the destination IP set to 192.168.2.100. (Please note that this is the address allocated to the device by the base on its isolated network.
Step 4
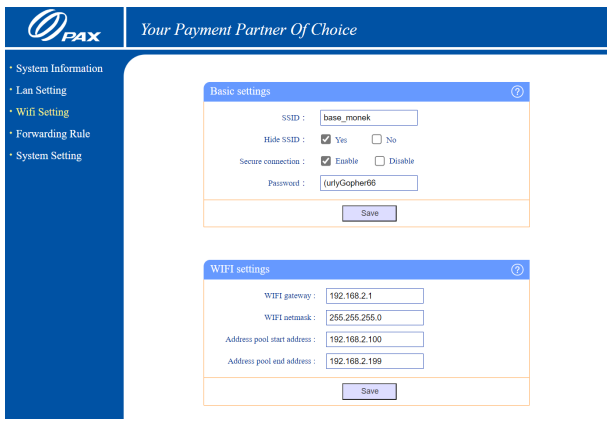
We recommend via the Wi-Fi settings to adjust the base to: • Hide the ssid and have a secure connection • Rename the base (to something easier to add to the terminal) • Update the password Leave the Wi-Fi settings as they are, unless there is a conflict with your connected network.
Step 5
To connect the terminal to the network you've just configured, access the menu located as three dots in the top right-hand corner of the terminal's interface, and select "Connect to Network."
Step 6
If this terminal is connected to a POS system, the next step involves pairing the two devices together. Please refer to your software provider's documentation for instructions on how to complete this pairing process