Overview
This guide will help you navigate your Monek Portal account if you encounter any issues. The Monek Portal is designed as your unique window to view your card payment history for your business. Here, you can see details such as transaction history, settlement history, and our fees for complete transparency.
Logging in
You should have received an email with a unique login link specifically for you. Here is an example of the type of email you should have received:
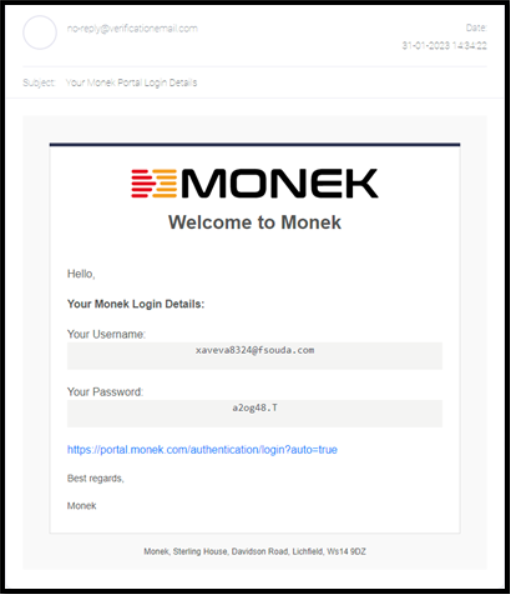
Once you click the blue link in the email, you will be redirected to set up your login details.
Changing Your Password
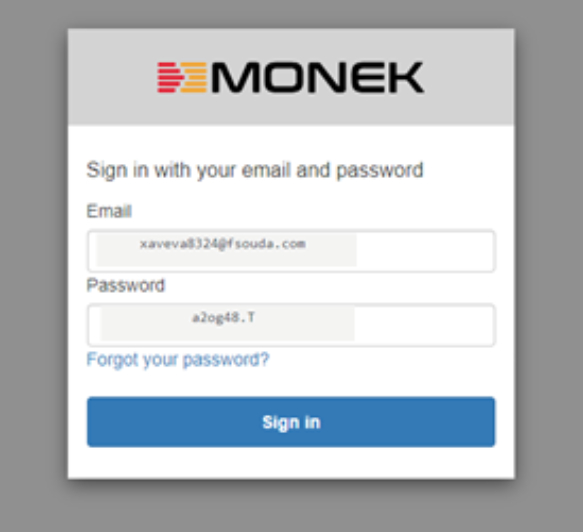
When your login window has loaded, use your email address as your username and the password given to you in your welcome email as your one-time password.
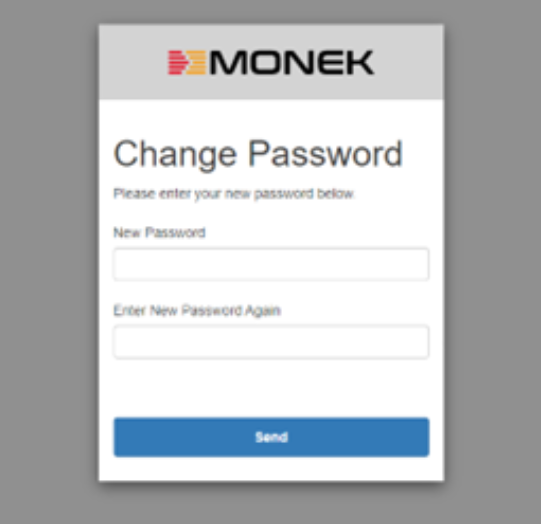
You will then be asked to change your password. Make sure to keep this safe.
Multi-Factor Authentication Methods
Once you have successfully changed your password, you will be asked to choose a multi-factor authentication method.
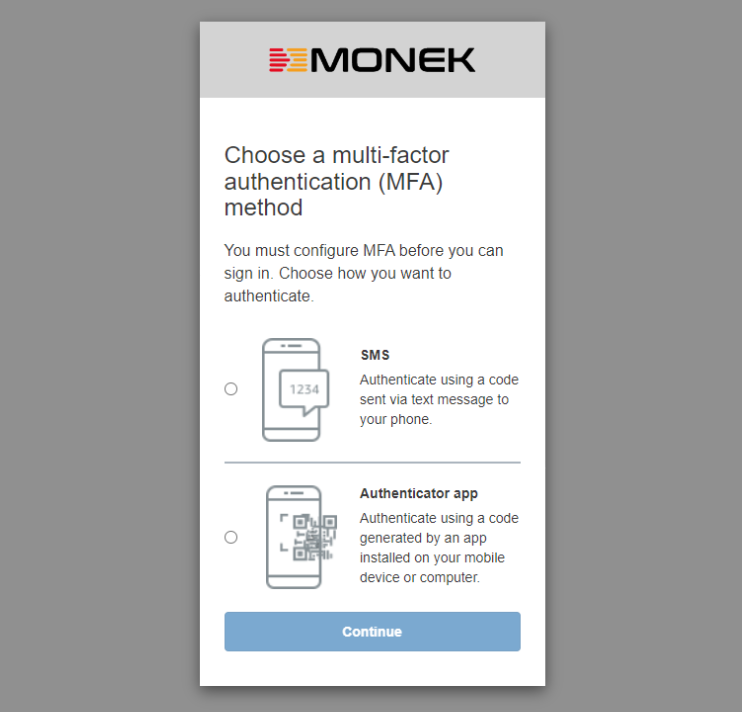
SMS Method (Recommended)
We recommend choosing ‘SMS’ as your method because it is the easiest and quickest option to get signed in. Simply enter your mobile number, and you will receive a text with a unique one-time code.
Authenticator App Method
If you prefer not to use your mobile number, there is an alternative method.
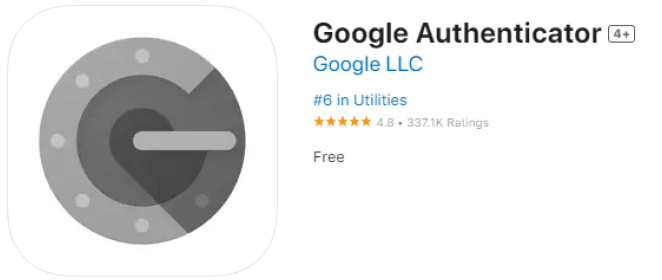
If you choose the authenticator app as your multi-factor authentication method, you must download an authentication app. We recommend the Google Authenticator app for this.
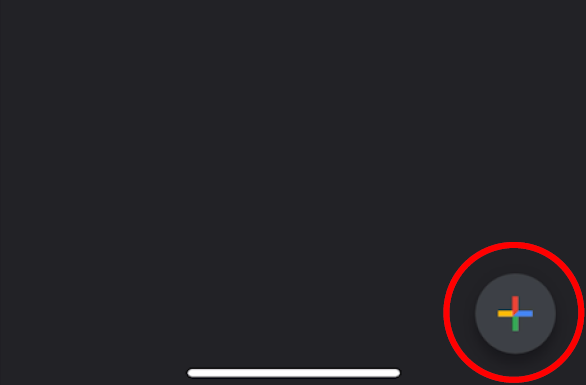
Once downloaded, open the app and select the ‘+’ icon to see the option to use the QR code scanner.
Using your authenticator app, scan the QR code (the fuzzy square) on your screen.
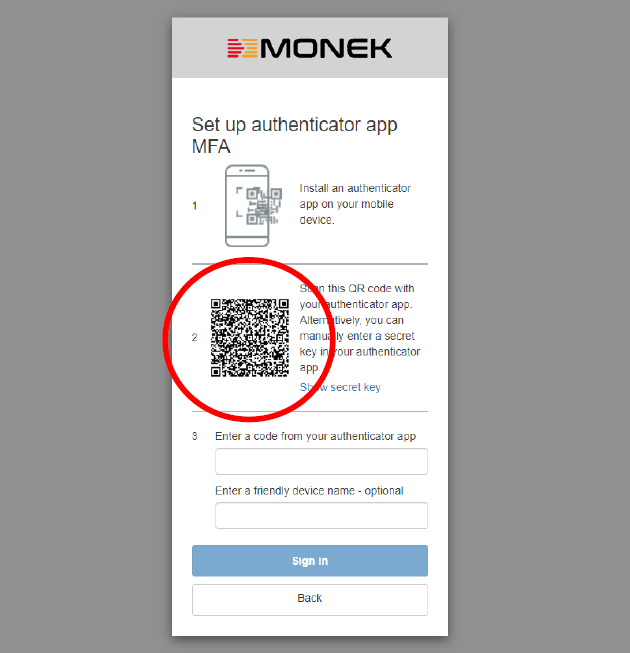
Doing this will generate a unique password that you can use to sign in to the Monek Portal. Be sure to keep the authentication app, as you will need it to view your new code the next time you log in.
Dashboard
The Monek Portal is your central hub where you can access all the details on the card payments your business has processed. The dashboard area is where you will see important notifications and alerts.
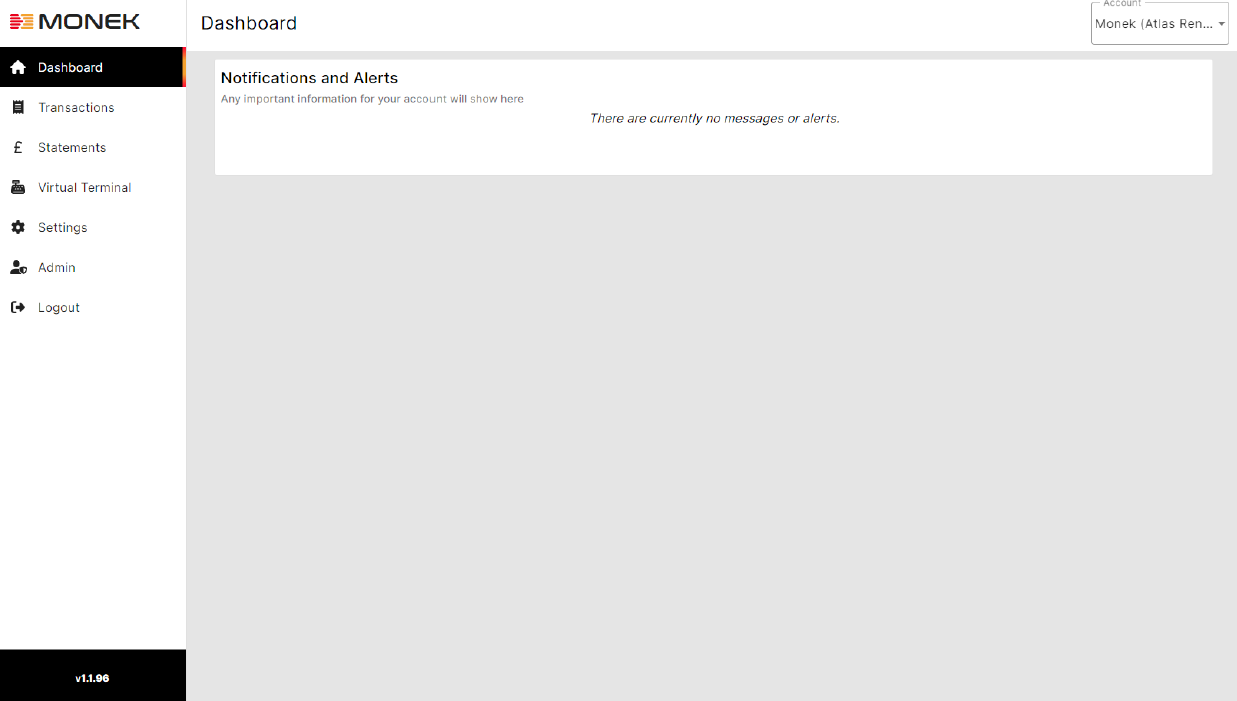
From the dashboard, you can access:
- Transaction information
- Statement information
- Virtual terminal (if applicable)
- Pay by Link (if applicable)
- Settings
- Admin
Account Dropdown
In the top right-hand corner of the portal, you will see a box labeled “accounts.” If you have multiple stores under your organization, you can manage which store you view by selecting the correct store in the account dropdown feature.

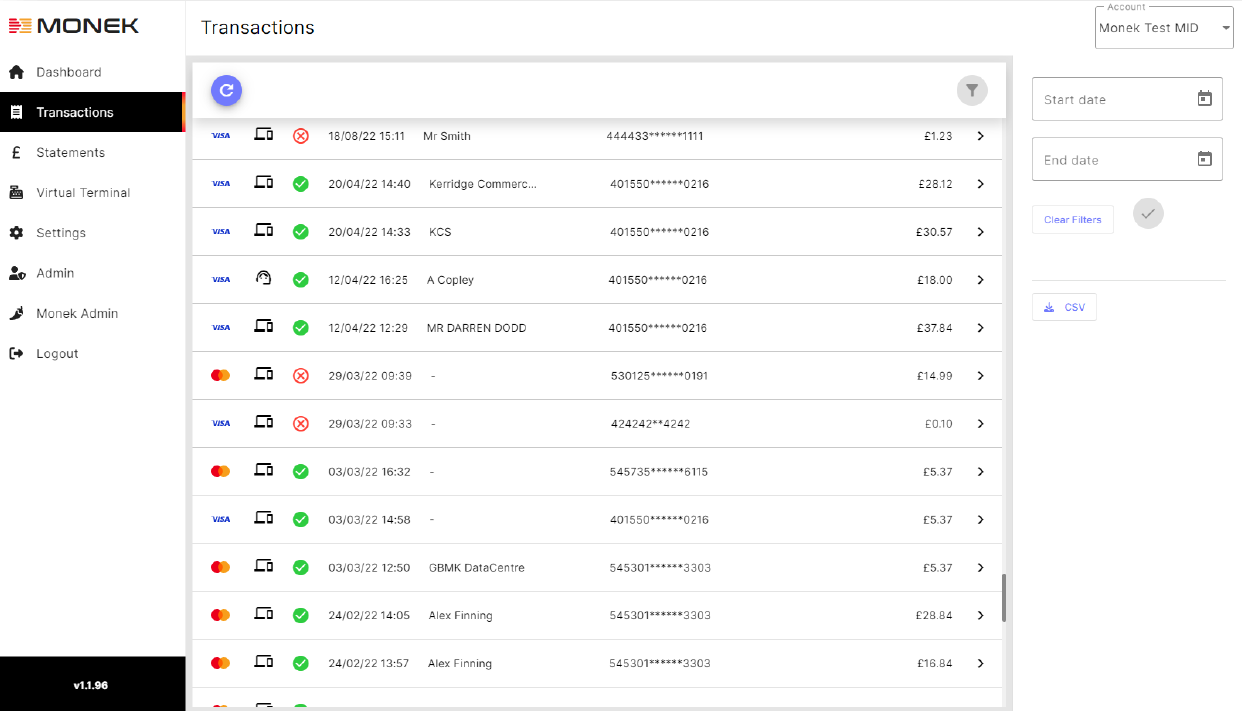
Transactions
See a real-time view of the card transactions your business is processing with our transactions page. You will also be able to view the following:
- Authorized or declined status of transactions
- Payment method
- Card scheme
- Amount and time of transaction
- Cardholder details (redacted)
Downloading CSV File
To download the transaction history, you must do this in the form of a CSV file. Follow these steps:
- Set a date range using the ‘Start Date’ & ‘End Date’ calendar tool in the top right corner of the screen and select the tick to confirm your date.
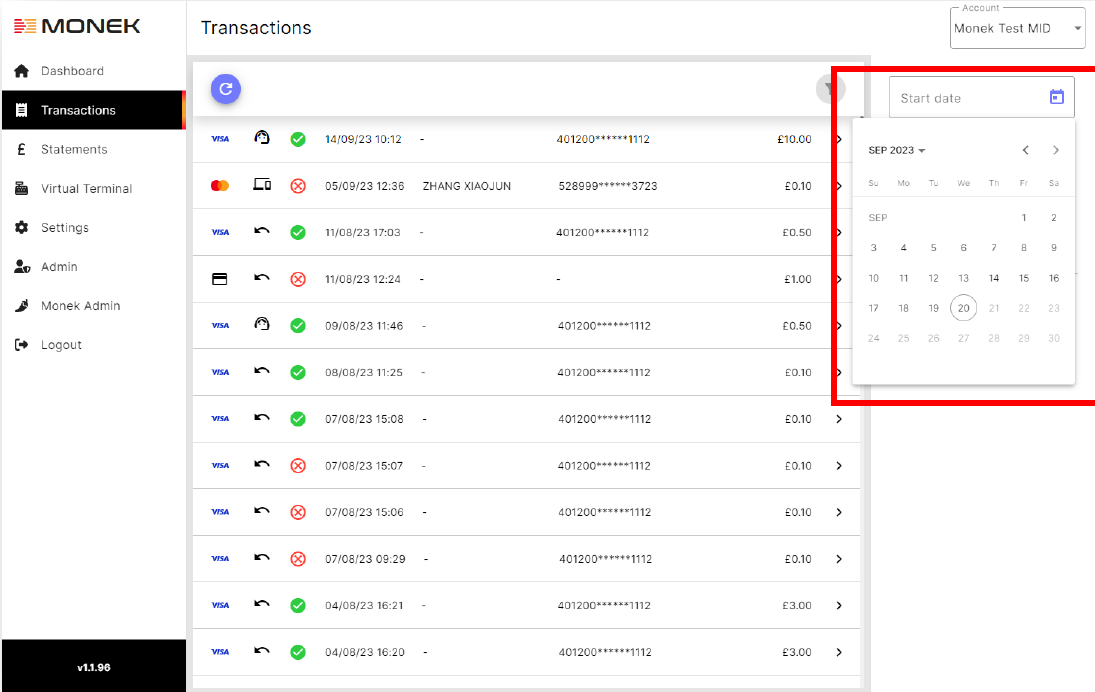
- Once the date range is confirmed, select the ‘CSV’ button and confirm the download. Note that the maximum date range you can select is 31 days.
Settlements
The settlements page is where you can see your card takings for each day, Monek’s fees, and finally your net settlement totals.
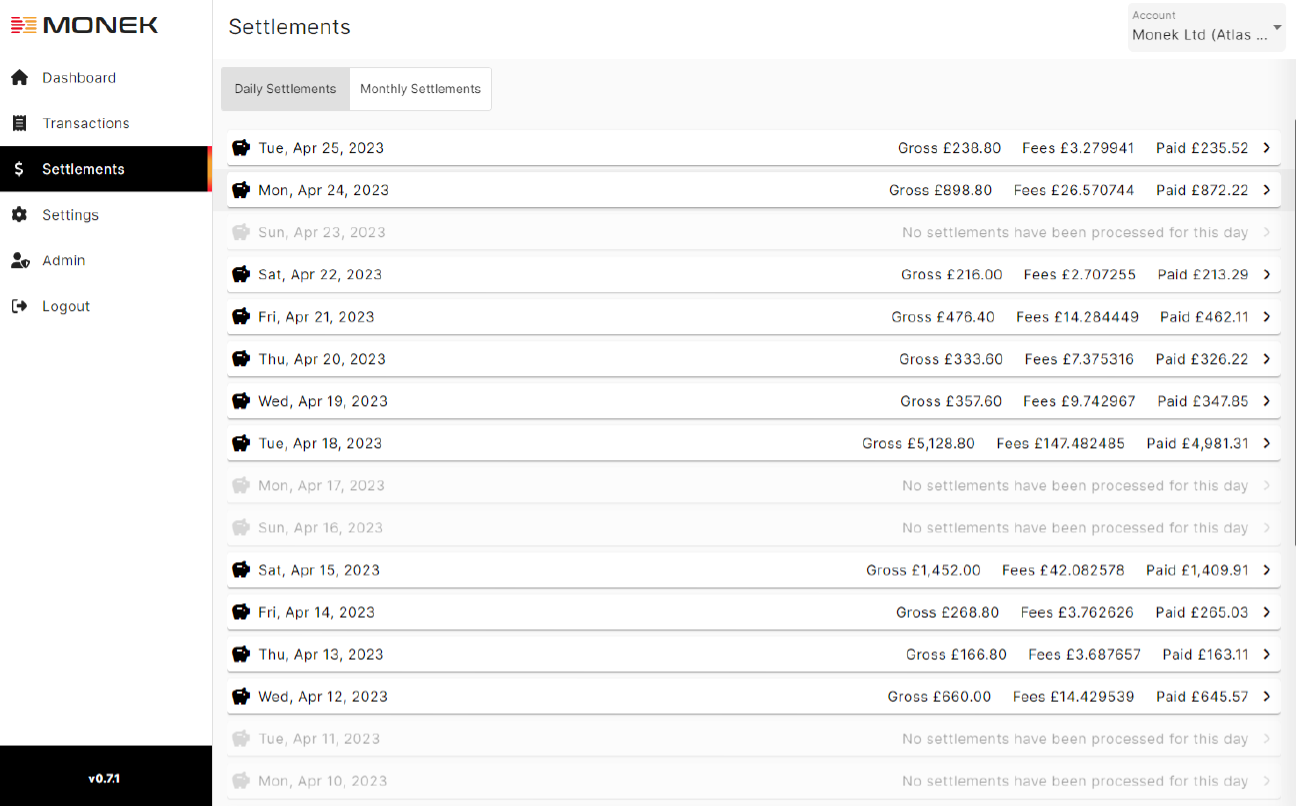
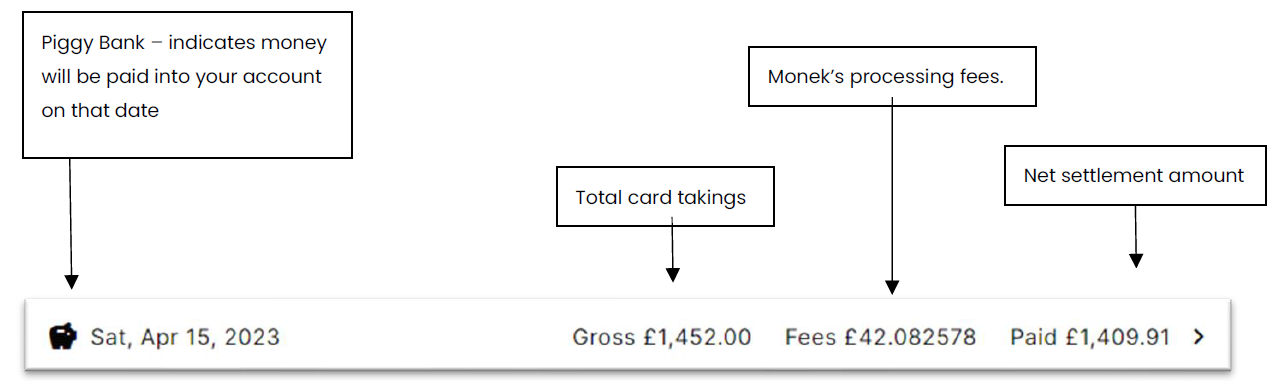
Piggy Bank
The Piggy Bank indicates when you will receive money. If the pig is black instead of grey, expect money to be paid into your account between 4 PM and 6 PM that day.
Note: Settlement will only be paid on working days. Any settlement expected on a non-working day (e.g., weekends and bank holidays) will be rolled forward to the next working day.
Download Settlement Reports
It’s now straightforward to download your daily or monthly settlement reports directly from your Monek Portal account.
Daily Settlement Report
- Make sure you have selected the ‘Daily Settlements’ toggle in the top left corner of the settlement page.
- Select the day you would like to download the settlement report for.
- Finally, select the “download report” button to download a PDF or CSV settlement report to your browser.
Monthly Settlement Report
- Make sure you have selected the ‘Monthly Settlements’ toggle in the top left corner of the settlement page.
- Find the month you want to download the settlement report for and then select it to download a PDF or CSV to your browser.
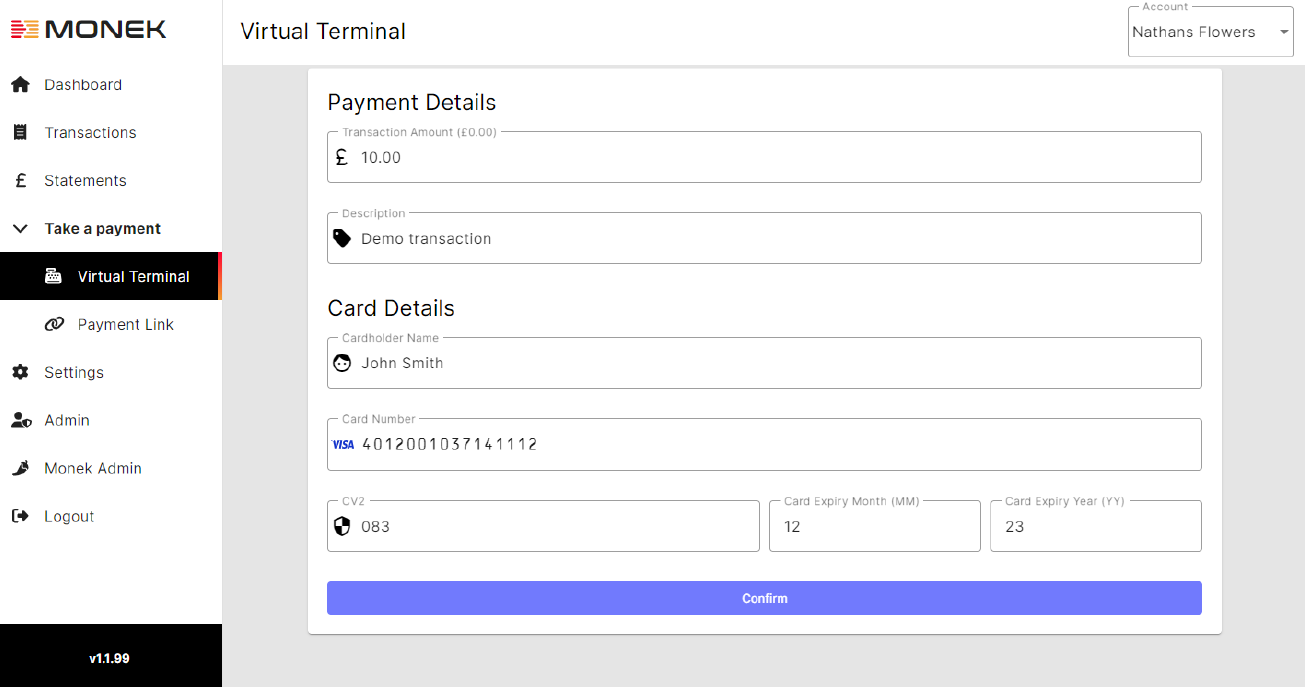
Virtual Terminal
A virtual terminal is an easy and simple way to accept a payment over the phone or in-store if you don’t have a POS terminal.
To do this, simply:
- Enter a transaction amount.
- Enter a description of what the payment is for.
- Proceed to enter the customer's card details: a. Card number – the long 16-digit card number b. CV2 – the 3-digit security number (usually on the back of the card)
- Select confirm to complete the transaction.
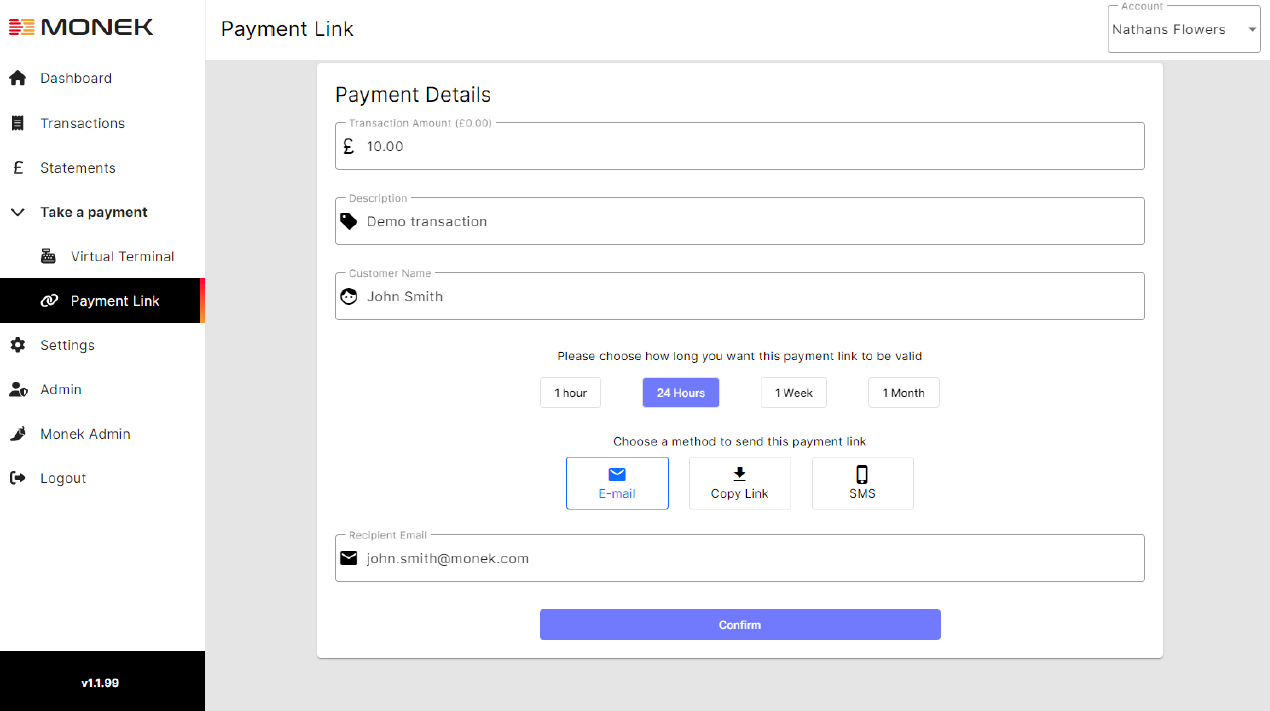
Payment Link
A payment link is a simple and useful tool to let customers pay by credit and debit card through a secure link. Send payment link invoices by email and reduce time chasing unpaid ones. Unique payment links let you keep track of each payment request.
To do this, simply:
- Enter a transaction amount.
- Enter a description of what the payment is for.
- Select how long you want the payment link to be valid.
- Choose how you would like to send the payment link: a. Email b. Copy the payment link c. Text / SMS
- Select confirm to send the payment link.
Payment link tracking
Track and monitor the status of every payment link your company has sent to your customers within the link tracking page. Here you can see in real time whether or not payment links have been paid. Click on a link to see the full details.
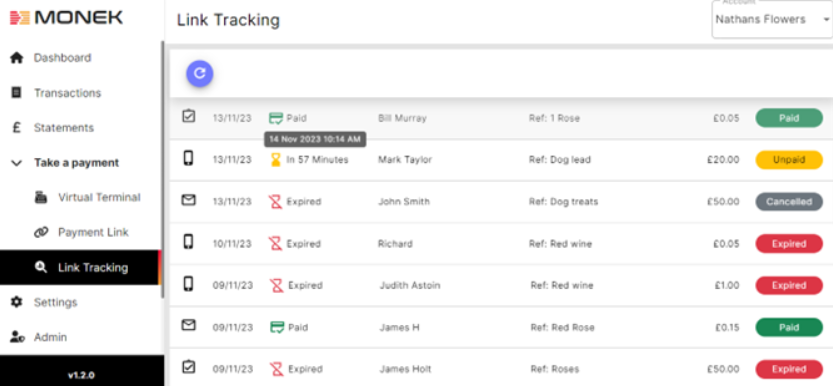
Payment link status’s
PAID = The payment link has been paid.
UNPAID = The payment link has not been paid.
CANCELLED = The payment link has been cancelled, it can no longer be paid.
EXPIRED = The payment link is not active and can no longer be paid

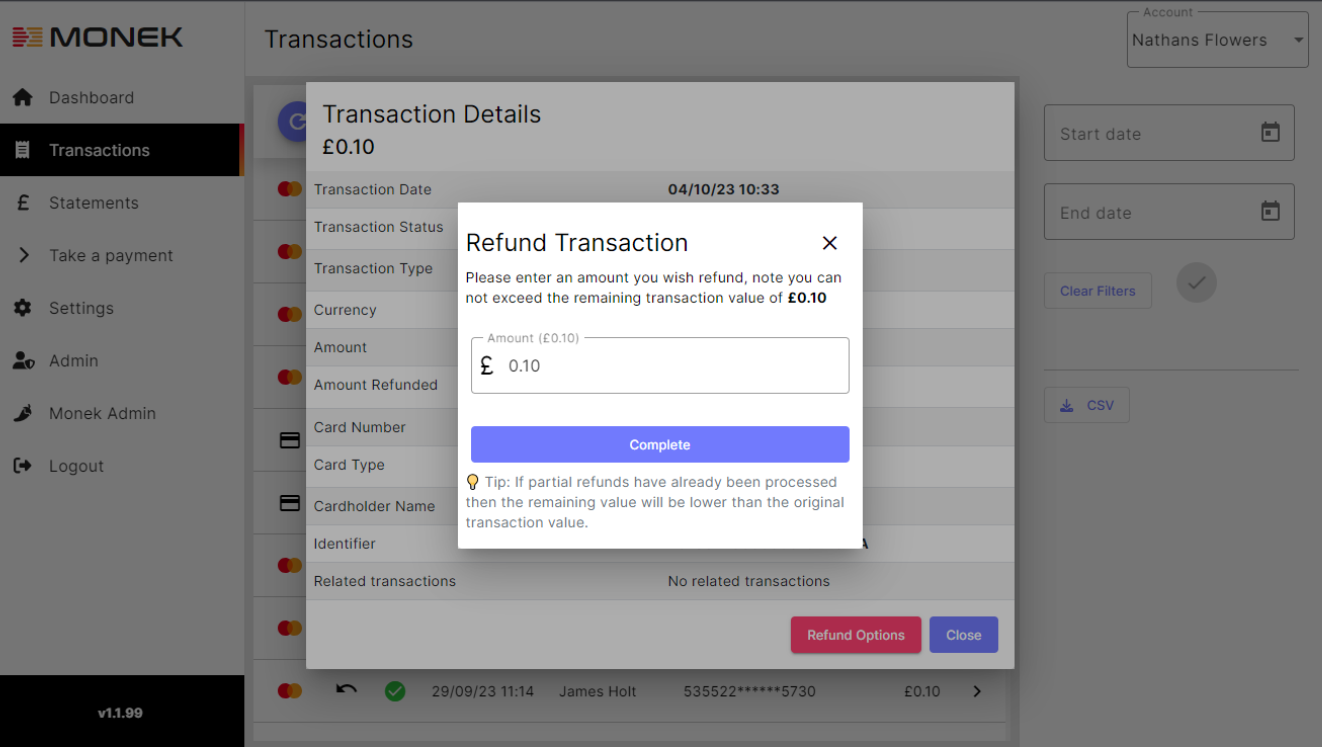
Refunds
Having a centralized place to perform refunds is an invaluable tool for both you and your customers. From your account, you can easily refund all types of transactions up to their original total value.
To issue a refund, follow these steps:
- Locate the Transaction: Find and select the transaction you wish to refund.
- Access Refund Options: Click on “Refund Options” in the transaction details pop-up.
- Specify Refund Amount: Enter the amount you wish to refund, ensuring it does not exceed the remaining value of the transaction.
- Complete the Refund: Click ‘Complete’ to process the refund.
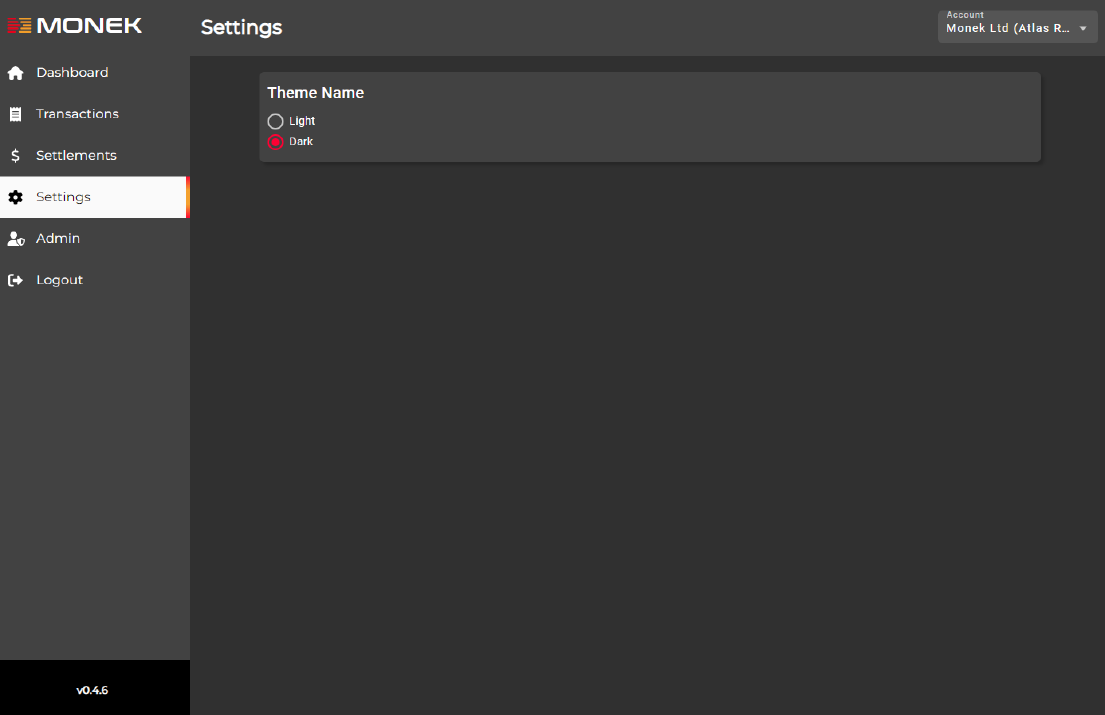
Settings
We offer the option to customize your portal to suit your preferences. If you prefer working in low-light environments, you may find the ‘Dark Mode’ theme particularly useful.
Admin
Use your admin page to manage all additional users to your Monek Portal account.
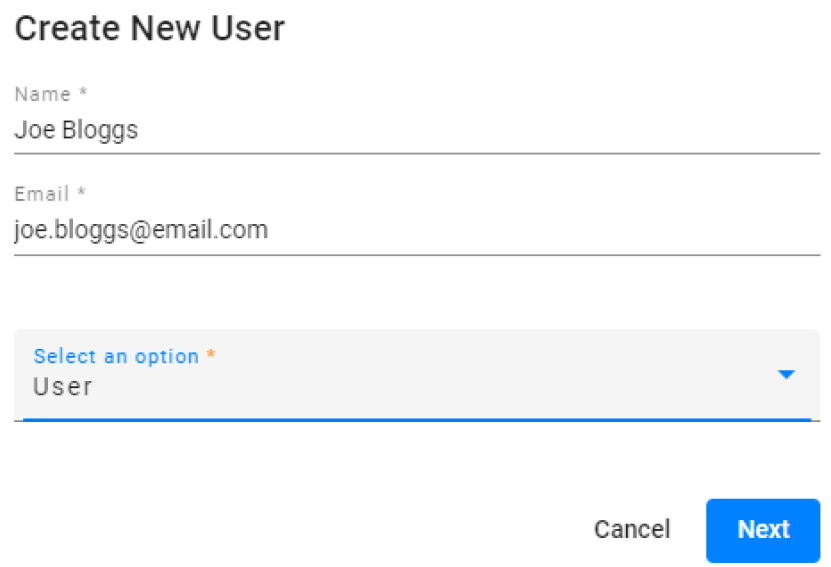
Adding a User
- Adding a user is simple. Select the ‘add new user’ icon in the top right corner of the page.

- Enter the new user’s details. This needs to be their full name and email address.
- Don’t forget to assign them a role. This will dictate what the user can and cannot access.